Yes, I mean it. Everyone can draw! If you put a mark on paper, you are now drawing. The question of "Can I draw?" should actually be "How well can I draw?" Drawing well takes practice. Period. I have done drawing lessons with kids who thought everything they drew was awful (it broke my heart). But after a few exercises, they realized that drawing wasn't so bad, they just had to be easier on themselves.
Before we get into the project, I'd like to share some tips for those who want to learn to draw well:
- Start simple. Don't try replicating a a city landscape when you are just learning how to draw. Start simple - draw from life and use bowls, cups, boxes, etc. Use simple objects that have simple shapes. Once you've got a good grip on those, ease into more complicated shapes, like a shoe or a sofa.
- Draw what you see, not what you know (when drawing from life). I have only had one time (literally) in my entire life where I had to draw what I knew, and that was because I had already drawn it five times from what I saw and it just wasn't working.
- Buy some drawing supplies. I know, my profile says I don't buy a lot of materials. Thankfully, all I am talking about is a 2B pencil and a really good eraser. An eraser that I cannot live without is the "gummy eraser." You can see what it looks like on Kit Kraft's site. What I adore about gummy erasers is that they work...well. You can mold it to any shape you want, and you simply tear it apart and put it back together to clean it. It's an artist's best-friend, and it's cheap. And I love cheap supplies.
- Be easy on yourself. You cannot become Rembrandt over night (did you know he was a phenomenal drawer as well as painter?).
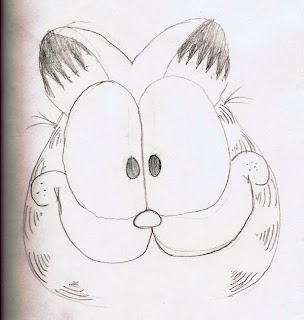
- Practice makes perfect. I know it's cliché, but it's true. In 5th grade, I constantly drew Garfield. Did I perfect it? Fairly well. In fact, here's one of the drawings I did back then:

Before we begin the project, we need to review some basic shapes:
 Rectangle
Triangle

Circle

Semicircle

Oval
Okay, now it's time for the project! Are you ready?
Materials
- paper (regular computer paper or notebook paper, but not construction paper)
- a pencil (any kind)
- an eraser (any kind)
- crayons or colored pencils
Instructions
- This is going to be a basic drawing project that will get your confidence going. Once you are ready to draw from life, start with cups and bowls. As always, please read through all the steps in this project before beginning.
- Place your sheet of paper longways on a sturdy and hard surface, such as a desk or table.
- Remember to draw lightly because we will erase some lines later.
- In the middle of the page, draw a rectangle that is slanted down to the right. Watch out that you don't make your rectangle to long (or skinny).

- Draw semicircles on the ends of both the left and right sides.

- Next, draw a shallow semicircle on the bottom of the rectangle, but only make the semicircle take up half the side of the rectangle.

- Now we are going to draw the neck and ear of the horse. Draw a straight line from the middle of the left side of the page up to the edge of the top semicircle. Continue your straight line up for the horse's ear. Then, come back down to the rectangle so that you've created a triangle at the top.

- Let's finish the neck. Draw a line from the middle of the bottom semicircle to the bottom of the page. Slant your line a little to the left.

- Now we get to erase some of our lines so that it more looks like a horse! Erase the left and right sides of the rectangle, the bottom of the rectangle where the semicircle is, the top part of the rectangle where the ear is, and all of the left semicircle.

- Next, we need to touch up a bit. Extend your ear line (the line on the right) down a little so that it looks like the ear is on this side of the horse's head. Then, extend the bottom semicircle's right and left ends up a bit so that the lines overlap the old rectangle.

- Now to add eyes and the nostril. Draw an oval at the top end of the horse's nose. Then draw an circle for the horse's eye.

- Now to finish your drawing! Draw the horse's main (you may want to wait to do this with crayons or colored pencils after you've colored your horse's head and neck). Also, draw the inside of the eye. Finally, draw a slanted line in the ear to show the back of the ear.

- Color your horse with crayons or colored pencils. Be sure to draw some kind of background!
- Drawings are a great gift, so you could give your excellent drawing to someone you like.
- Drawings are great to hang on the wall, so ask your parents if you can pin your drawing on your bedroom wall with push pins.
- Do this project again and create different looking horses in all kinds of shapes and colors.
- Crayola.com has a variety of coloring pages you can print as well as other art ideas.
- Drawsketch.about.com - "If want the simplest steps to take in creating your own cartoon characters, starting with the easiest shapes to draw, this lesson is for you."
- Dreezle.com is really cool! You can draw online using different types of brushes and colors! (Tip: the bomb icon in the upper right corner erases everything you've done.)


No comments:
Post a Comment