 Introduction
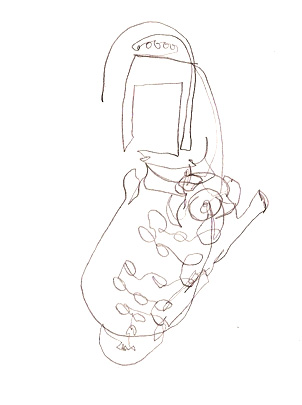
Blind contours are a great way to loosen kids up and help them not be apprehensive about drawing. This drawing method is also a great warm-up exercise if your kids need something to get their creative juices flowing. As an added bonus, blind contours are really fun to look at and compare! The key to a good blind contour is a lot of detail and not looking at the paper. Every time you do a blind contour (even of the same object) you get a new result (see my two blind contours of the same person below).

 Contour drawings illustrate the lines of an object and should represent much of the detail the object has. Contours are only lines as opposed to regular drawings that might have shading.
To do a blind contour drawing, as you can probably guess, you don't look at your paper at all. You focus your eyes on the object your a drawing, and your pencil moves as your eyes move across the object. Think of the pencil and your eyes as the same body part, both moving at the same speed and looking/drawing the same part of the object. This really helps kids draw what they see rather than what they know. It also helps them identify details and see how an object really looks.
This project will be done using a continuous line for the whole drawing. That may sound daunting, but I have found it to be a useful strategy for kids to not look at their paper. As soon as they pick up their pencil, they naturally want to look at their paper to see where to place their pencil next. By drawing one continuous line, their pencils never leave the paper, thus reducing the need to look at the paper. Your kids may not believe that their drawing can look like the object if they don't look at the paper. But as you can see from my blind contours on this post, you can actually tell what the object is.
In college, I did blind contours all the time. I would draw a 30-second blind contour of someone sitting in front of me, then I would do a 5-minute sighted drawing of them. The sighted drawings always came out better when I started with a blind contour because I was aware of the person's features and details before I began my regular drawing.
 Materials
- a piece of paper
- a pencil, crayon, colored pencil, or marker
- Since this project is done in one continuous movement, I am not able to effectively provide sample images of the progression of the project. But I think you'll be fine without them. :)
- Contours shouldn't take a long time to do. Give your kids about 3 minutes the first time and see if they need more or less time for the next session.
- Have your kids place their sheets of paper on a sturdy and hard surface, like a desk or table.
- Either give each kid an object to draw or let them choose something. This object could be anything, but make sure it has some sort of detail to it (lines, etc.).
- Tell your kids to choose a part of the object to begin drawing. If they are beginning at the top of the object, they'll want to begin drawing toward the top of their paper. Likewise for other areas of the object.
- Let your kids know that they need to draw as much detail as they can. If I were drawing a tape dispenser, I would want to make sure to draw the serrated edge where the tape is cut as well as all the lines of the dispenser and roll of tape.
- Drawing words or symbols of an object can throw a kink into the project (the pencil tends to come up off the page when drawing words, etc.), so encourage them to leave out these features.
- They may become a little frustrated about not being able to pick up their pencil. They might say, "But I want to get from this side to that side." All they have to do is draw a light line to that side. Or, better yet, draw an area leading to that side (even if they've already drawn it). The main point to remember is that if their eye moves across the object, their hand should draw a line across the page representing that movement. The hand and the eyes are one!
- Keep an eye on their eyes to make sure they aren't sneaking a peek at their drawing! This is very tempting to kids, but assure them that their drawing will come out much better if they don't look at all. (It's really true. A half-blinded contour just ends up looking like a bad sighted drawing.)
- When they are done, they can look at their drawing but cannot add to it. They will laugh at their drawing and point out the funny parts.
- If anyone seems upset about their blind contour, assure them that this is not an exercise to draw well, but rather an exercise to have fun and loosen up. Nobody's drawing will look like a "good" drawing. All the drawings will look crazy!
- This is a project that is super fast and a lot of fun. They will want to do it over and over. Try giving your kids scrap paper and let them have a blast drawing blind contours of anything they can find.
- Doing blind contour portraits are really fun...and funny! Take turns with your kids and model for them. You can also partner them up for this, or provide each student with a magazine page that has a face on it.
- Have your kids explore doing multiple blind contours on one page. I did this in high school and my drawing got first place in the Pen and Ink category as well as Best in Show! Hard to believe, right?
- The Warhol: Resources and Lessons - this site has a fun contour activity based off of Andy Warhol's Five Views of an Onion drawing.
- My Creativity Blog has a post about doing blind contour drawings with an art class.
- Squidoo has a nice explanation of how to move your pencil with what you eye sees: "Start at a chosen place on the object along one of the object's outlines, and slowly move your pencil along the paper as you move your eyes along the object's outlines and other features."
- HubPages provides a nice explanation of blind contours.
- Drawspace has a perfect example of a blind contour drawing of a hand. Please note that I consider this to be a really amazing blind contour, so if you show this image to your kids, make sure they understand that most blind contours aren't as proportionate as this one.


No comments:
Post a Comment